Friday 31 July 2015

Deploy Azure DB via Web App – Using VS 2013 Release Management – Part 2 – Setup RM Component and Template to Deploy

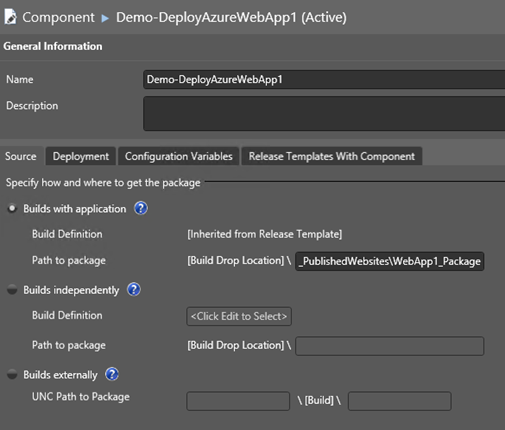
In the Part 1 of this post, creating a web deployment package with dacpac, is explained. To deploy the dacpac to Azure DB via web deployment package, a Release Management template should be setup. The same component created in article “How to Deploy to Azure Websites with TFS build 2013 and VS Release Management 2013”, can be enhanced to deploy the database, using the dacpac file in web deployment package.
21
22 
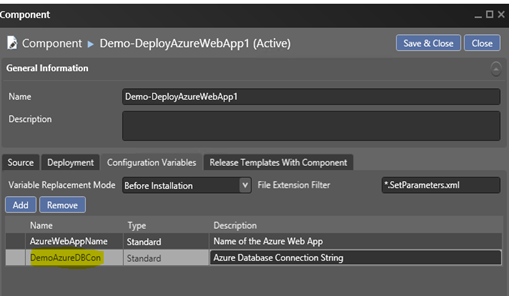
In the Configuration Variables tab the newly added token __DemoAzureDBCon__ (adding the token in publish profile explained in Part 1) is set as a variable.
23
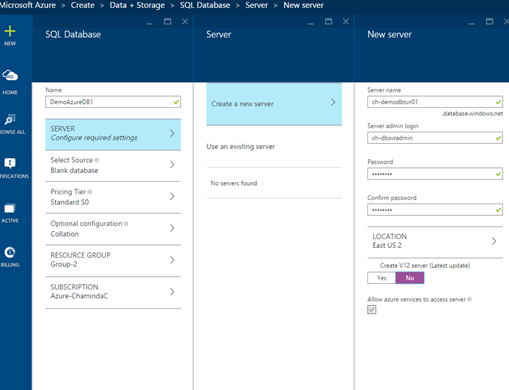
Next step is setting up an Azure DB. To do this create an SQL database in Azure management portal.
24
Select Create a new Azure DB server, to create a new DB server for Azure DB. Make sure to select Allow Azure services to access server option.
25
Database created in Azure with above options.
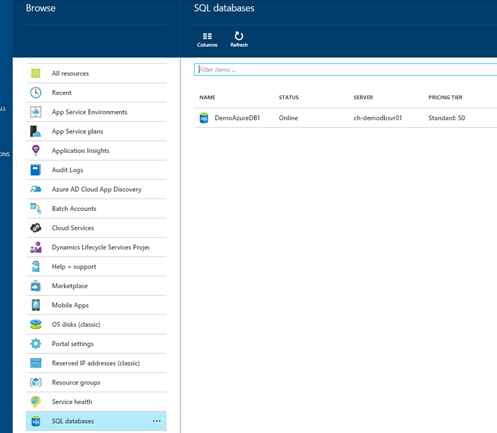
26
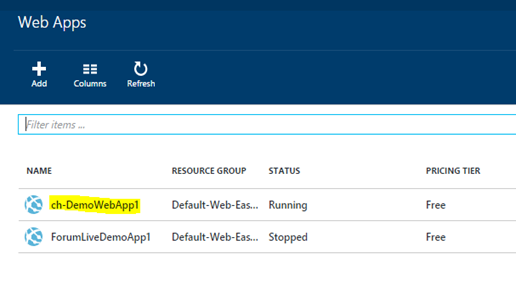
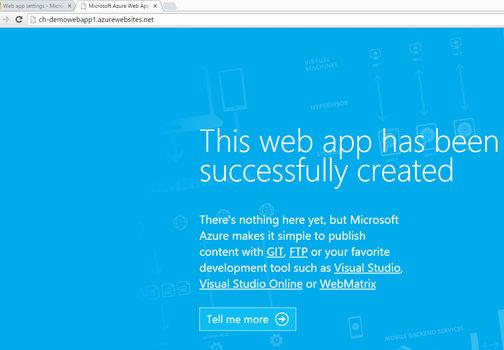
A web app in Azure is created to deploy the web application.
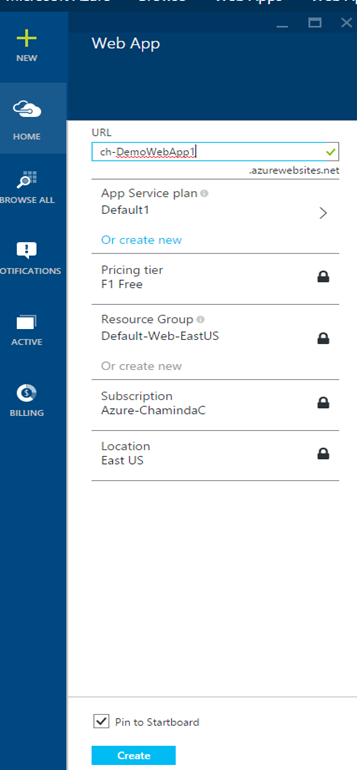
27
28
32
Copy the connection string (ADO.Net connection string) from the database connection strings and add it in the created web app settings, as a SQL Database connection.
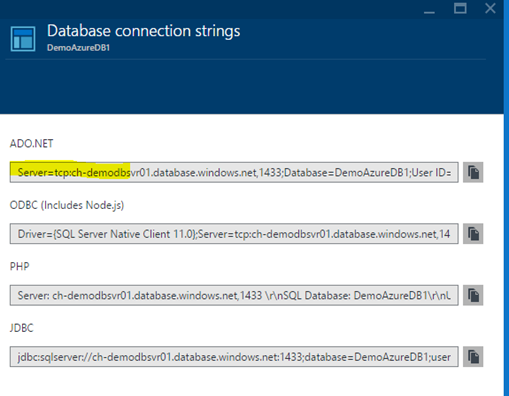
28.1
Make sure to update the correct password to the connection string (Copied one has {your_password_here}).
Server=tcp:ch-demodbsvr01.database.windows.net,1433;Database=DemoAzureDB1;User ID=ch-dbsvradmin@ch-demodbsvr01;Password={your_password_here};Encrypt=True;TrustServerCertificate=False;Connection Timeout=30;
28.2
In the Web App download the publish profile.
29
From the publish profile copy the values and set the parameters in the Release Management template.
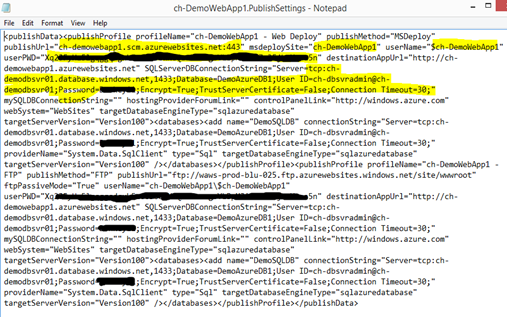
30
  • WebAppName = Package zip file name (Package created with TFS build in Part 1).
  • PublishUrl = Publish Profile –> PublishUrl.
  • PublishUser = Publish Profile –> userName
  • PublishPassword = Publish Profile –> userPWD
  • AzureWebAppName = Publish Profile –> msdeploySite
  • DemoAzureDBCon = Publish Profile –> SQLServerDBConnectionString
31
With this template a release can be triggered using the build (Part 1).
33
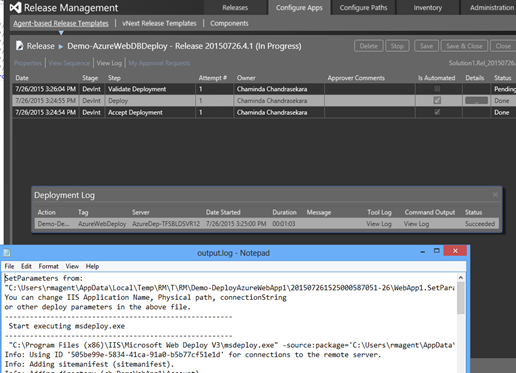
Web Application gets deployed.
34

image
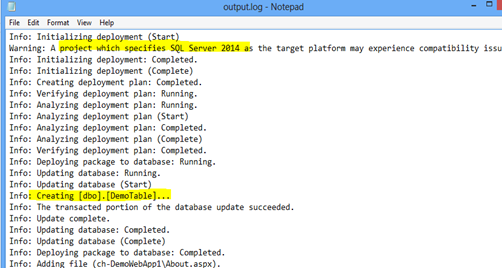
Database deployed with Web App.
35
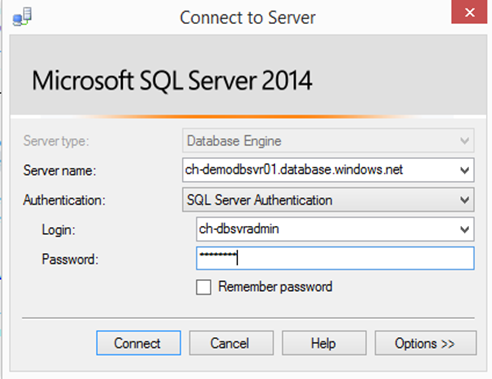
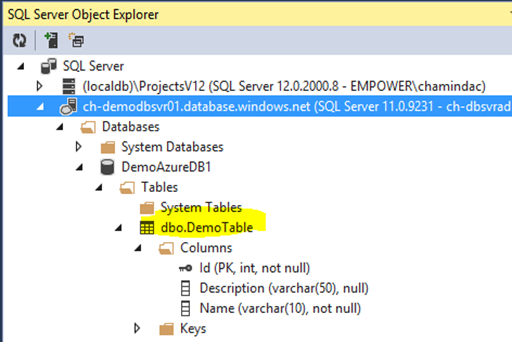
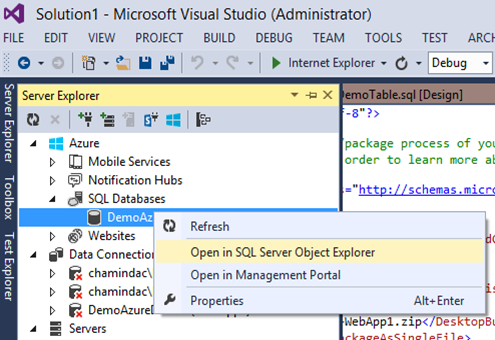
Created Azure DB can be viewed in SQL Object Explorer in VS.
36
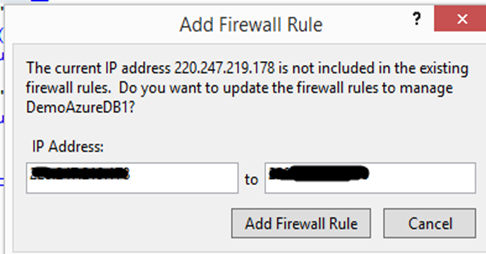
Allow the IP if prompt.
37
38
39

Tuesday 28 July 2015

Deploy Azure DB via Web App – Using VS 2013 Release Management – Part 1 – Package SQL dacpac with Web Deploy Package in TFS Build

As explained in the post “How to Deploy to Azure Websites with TFS build 2013 and VS Release Management 2013” a tool can be created in VS 2013 Release management to deploy web sites to Azure. Below are the steps to deploy a azure database with the web application, using the same tool (enhanced to handle database deployments).
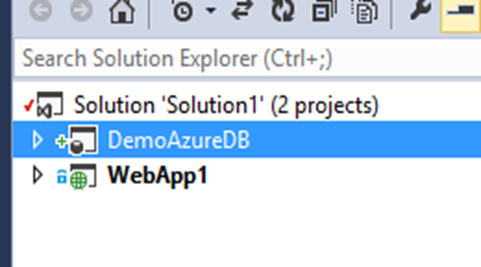
In the solution taken for as example a Web application project and a Database project created.
1
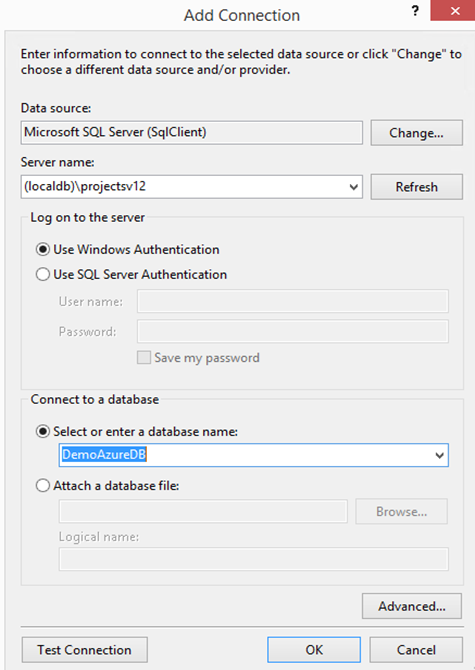
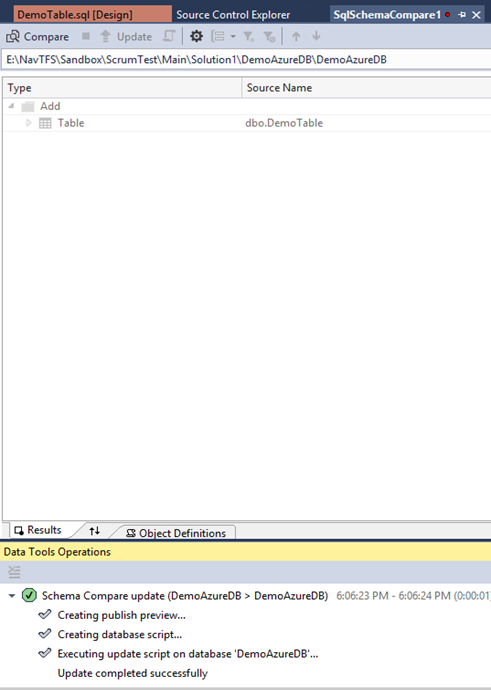
For demo purpose one table added to the database and created in localdb (db server provided with Visual Studio).
2
3
4
5
6

This database is added to the Web Application project by defining a connection string in the web.config file.
7
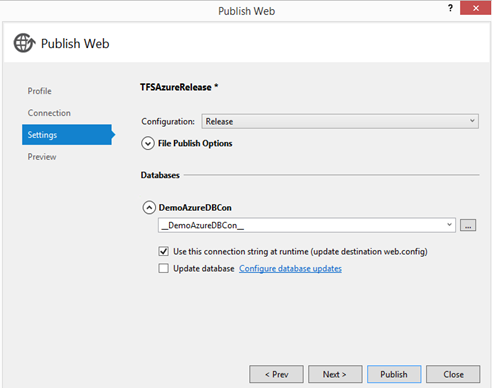
In the publish profile (for details on creating a publish profile for the web application refer the article here) database connection should be defined as a token understandable by the VS 2013 Release Management (__ as prefix and suffix).
8
Once this is published the required deployment packages created.
9
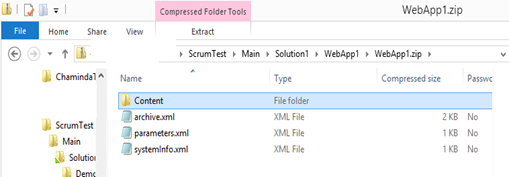
But the .dacpac file to deploy the db is not added to the web package zip file. It is required to get .dacpac inside the web package to deploy it with web application deployment.
10
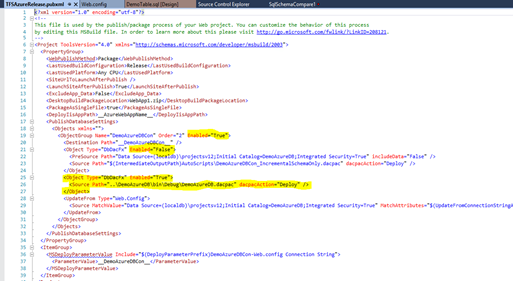
In order to get the .dacpac file to web package change the publish profile (pubxml) content as shown below.
Current
11
Changes highlighted.
  • DB Connection object group enabled.
  • Default created “DbDacFx” object type is disabled.
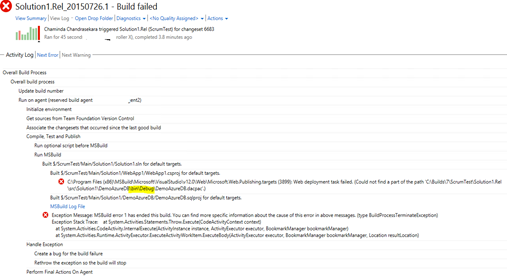
  • Added new “DbDacFx” with dacpacAction Deploy and path set to relative path of the .dacpac file being built for the SQL project. Note that bin\debug path is set here which is not going to work with TFS builds.
12
Then there should be a project dependency added to build the SQL project before the web application project to make sure the availability of .dacpac file.
16
With the above change when the web application is published as a web deploy package, the .dacpac file gets included in it.
13
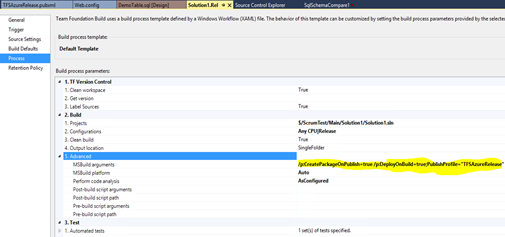
The next step is to get this packaged via TFS builds. As explained in the article here TFS build can be setup for this purpose with build arguments specified below.
/p:CreatePackageOnPublish=true /p:DeployOnBuild=true;PublishProfile="TFSAzureRelease"
14
As expected FS build fails with error, unable to find .dacpac file.
15
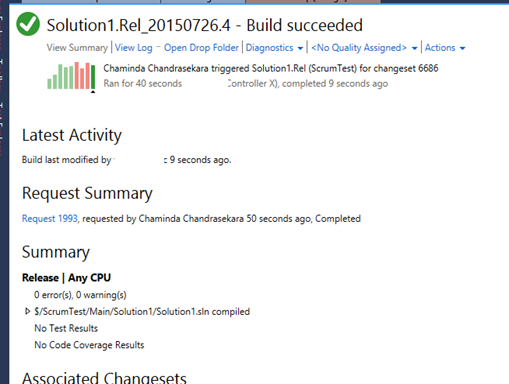
By changing the publish profile relative path to .dacpac file as below as will give a successful build.
17
18

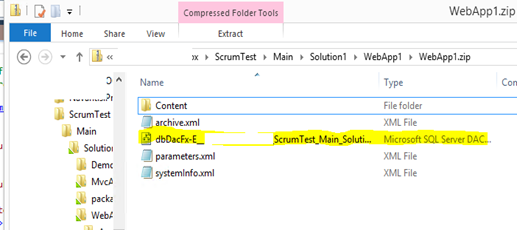
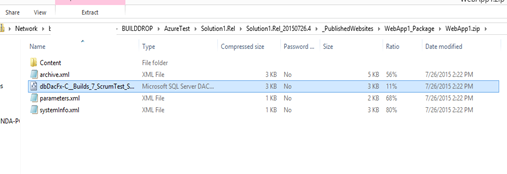
Web deployment package in the drop now contains the .dacpac file.
20
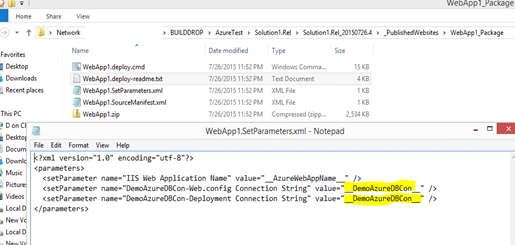
Set parameter xml is created with the tokens added for DB connection.
19
In Part 2 let’s look at how to enhance the release management component, to deploy web application package (explained in article here), with the database .dacpac file to Azure DB.

Wednesday 15 July 2015

Send Custom Build Notes with TFS Build Using PowerShell

One of the teams, required a customized build note including only Bug, User Story work items listed with few details. The default alert email of the TFS 2013 only send an email in below format which does not say which is the type of the work item associated with the build. It just said “work item <id>” for any work item and team was not happy about that.
image
Very interesting solution provided here with PS scripts by MIKAEL DEURELL.
Few issues were there in the sample script provided in MIKAEL DEURELL‘s article the team who requested this specific build note is not happy about.
1. Since generating of build notes, depends on the date of the last good build to get the associated work items for current build, it is not possible to queue a build for a previous changeset, to make it the last good build, and another with latest changeset, will not send the associated work items correctly.
2. It sends all the work items and the team only wanted user story and bug WITs.
3. If a task work item associated it does not send the parent work item.
4. Team wanted the note to be formatted in a more readable format.

To overcome these issues the enhanced version (by me) of the sample script provided in MIKAEL DEURELL‘s article  is below.


  1
  2
  3
  4
  5
  6
  7
  8
  9
 10
 11
 12
 13
 14
 15
 16
 17
 18
 19
 20
 21
 22
 23
 24
 25
 26
 27
 28
 29
 30
 31
 32
 33
 34
 35
 36
 37
 38
 39
 40
 41
 42
 43
 44
 45
 46
 47
 48
 49
 50
 51
 52
 53
 54
 55
 56
 57
 58
 59
 60
 61
 62
 63
 64
 65
 66
 67
 68
 69
 70
 71
 72
 73
 74
 75
 76
 77
 78
 79
 80
 81
 82
 83
 84
 85
 86
 87
 88
 89
 90
 91
 92
 93
 94
 95
 96
 97
 98
 99
100
101
102
103
104
105
106
107
108
109
110
111
112
113
114
115
116
117
[void][System.Reflection.Assembly]::LoadWithPartialName("Microsoft.TeamFoundation.Client")  
[void][System.Reflection.Assembly]::LoadWithPartialName("Microsoft.TeamFoundation.Common")
[void][System.Reflection.Assembly]::LoadWithPartialName("Microsoft.TeamFoundation.Build.Client")  
[void][System.Reflection.Assembly]::LoadWithPartialName("Microsoft.TeamFoundation.Build.Common")  
[void][System.Reflection.Assembly]::LoadWithPartialName("Microsoft.TeamFoundation.VersionControl.Client")  
[void][System.Reflection.Assembly]::LoadWithPartialName("Microsoft.TeamFoundation.VersionControl.Client.VersionSpec")
[void][System.Reflection.Assembly]::LoadWithPartialName("Microsoft.TeamFoundation.WorkItemTracking.Client")  

$tfsCollectionUrl = "http://tfsserver:8080/tfs/projectcollection"
$server = new-object Microsoft.TeamFoundation.Client.TfsTeamProjectCollection(New-Object Uri($tfsCollectionUrl))
$buildServer = $server.GetService([Microsoft.TeamFoundation.Build.Client.IBuildServer])
$buildDetail = $buildServer.QueryBuilds("teamprojectname", "builddefinitionname") | where { $_.BuildDefinition.LastGoodBuildUri -eq $_.Uri } #| select BuildNumber

$buildDetail.BuildNumber | Out-File "$PSScriptRoot\tmpBuildNumber.txt"

$versionControlServer = $server.GetService([Microsoft.TeamFoundation.VersionControl.Client.VersionControlServer])
$workItemStore = $server.GetService([Microsoft.TeamFoundation.WorkItemTracking.Client.WorkItemStore])
$LinkingService = $server.GetService([Microsoft.TeamFoundation.Client.TswaClientHyperlinkService])

$lastGoodBuildStartTime = $buildDetail.StartTime
$changesetVersionSpec = New-Object Microsoft.TeamFoundation.VersionControl.Client.ChangesetVersionSpec($buildDetail.SourceGetVersion.Substring(1)) 
$latest = [Microsoft.TeamFoundation.VersionControl.Client.VersionSpec]::Latest
$recursionType = [Microsoft.TeamFoundation.VersionControl.Client.RecursionType]::Full
$historySinceLastGoodBuild = $versionControlServer.QueryHistory("$/Orca/Main", $latest, 0, $recursionType, $null, $changesetVersionSpec, $latest,[Int32]::MaxValue, $true, $false)

$historySinceLastGoodBuild.Length | Out-File "$PSScriptRoot\tmpHistoryCount.txt"

$workItemsSinceLastGoodBuild = $historySinceLastGoodBuild | foreach-object {$_.workitems}

$workItemsSinceLastGoodBuild.Length | Out-File "$PSScriptRoot\tmpWorkItemCount.txt"

$tabName = "WorkItemTable"

#Create Table object
$WorkItemTable = New-Object system.Data.DataTable $tabName

#Define Columns
$colWorkItemType1 = New-Object system.Data.DataColumn WorkItemType,([string])
$colId = New-Object system.Data.DataColumn Id,([int])
$colTitle = New-Object system.Data.DataColumn Title,([string])
$colState = New-Object system.Data.DataColumn State,([string])
$colAssignedTo = New-Object system.Data.DataColumn AssignedTo,([string])
$colWILink = New-Object system.Data.DataColumn WILink,([string])

#Add the Columns
$WorkItemTable.columns.add($colWorkItemType1)
$WorkItemTable.columns.add($colId)
$WorkItemTable.columns.add($colTitle)
$WorkItemTable.columns.add($colState)
$WorkItemTable.columns.add($colAssignedTo)
$WorkItemTable.columns.add($colWILink)

$workItemsSinceLastGoodBuild |
foreach-object { 
    if ($_.Type.Name -eq "Task") 
    {
        # Get parent work item of task
        foreach($link in $_.WorkItemLinks)
        {
             if ($link.LinkTypeEnd.Name -eq "Parent")
             {
                $ParentWorkItem = $workItemStore.GetWorkItem($link.TargetId)

                #Create a row
                $row = $WorkItemTable.NewRow()

                #Enter data in the row
                $row.WorkItemType = $ParentWorkItem.Type.Name
                $row.Id =  $ParentWorkItem.Id
                $row.Title =  $ParentWorkItem.Title
                $row.State =  $ParentWorkItem.State
                $row.AssignedTo =  $ParentWorkItem.Fields["Assigned To"].Value
                $row.WILink = $LinkingService.GetArtifactViewerUrl($ParentWorkItem.Uri).AbsoluteUri

                #Add the row to the table
                $WorkItemTable.Rows.Add($row)

                break
             }
        }
    }
    else 
    {
        # Adding associated work item other than task

        #Create a row
        $row = $WorkItemTable.NewRow()

        #Enter data in the row
        $row.WorkItemType = $_.Type.Name
        $row.Id =  $_.Id
        $row.Title =  $_.Title
        $row.State =  $_.State
        $row.AssignedTo =  $_.Fields["Assigned To"].Value
        $row.WILink = $LinkingService.GetArtifactViewerUrl($_.Uri).AbsoluteUri

        #Add the row to the table
        $WorkItemTable.Rows.Add($row)

    }

}

$WorkItemTable.Rows.Count | Out-File "$PSScriptRoot\tmpWorkItemTableCount.txt"

$style = "<style>BODY{font-family: Arial; font-size: 10pt;}"
$style = $style + "TABLE{border: 1px solid black; border-collapse: collapse;}"
$style = $style + "TH{border: 1px solid black; background: #dddddd; padding: 5px; }"
$style = $style + "TD{border: 1px solid black; padding: 5px; }"
$style = $style + "</style>"


$messageBody = $WorkItemTable |sort WorkItemType,Id -Unique | Select-Object WorkItemType, Id, State, Title, AssignedTo, WILink | ConvertTo-HTML -head $style | Out-String

$Recipients = @("user1@yourOrg.com", "user2@yourOrg.com", "user3@yourOrg.com")

Send-MailMessage -From "tfs@yourorg.com" -To $Recipients -SmtpServer "YourSMTPServer" -Body $messageBody -Subject "$Env:TF_BUILD_BUILDNUMBER Build Notes" -BodyAsHtml

One more enhancement could be made to the script to generate the note in pre build and send it in post build. That is by changing the below script segment to write to a temp file in pre build.


1
2
3
4
5
$messageBody = $WorkItemTable |sort WorkItemType,Id -Unique | Select-Object WorkItemType, Id, State, Title, AssignedTo, WILink | ConvertTo-HTML -head $style | Out-String

$Recipients = @("user1@yourOrg.com", "user2@yourOrg.com", "user3@yourOrg.com")

Send-MailMessage -From "tfs@yourorg.com" -To $Recipients -SmtpServer "Ad-ex2003.domainx.local" -Body $messageBody -Subject "$Env:TF_BUILD_BUILDNUMBER Build Notes" -BodyAsHtml

Above can be changed as shown below so that it writes to a temp file in pre build.


1
$WorkItemTable |sort WorkItemType,Id -Unique | Select-Object WorkItemType, Id, State, Title, AssignedTo, WILink | ConvertTo-HTML -head $style | Out-File "$PSScriptRoot\..\tmpBuildNote.txt"

In post build the temp file content can be read like shown below and send the email.


1
2
3
4
5
$messageBody = Get-Content "$PSScriptRoot\..\tmpBuildNote.txt" | Out-String

$Recipients = @("user1@yourOrg.com", "user2@yourOrg.com", "user3@yourOrg.com")

Send-MailMessage -From "tfs@yourorg.com" -To $Recipients -SmtpServer "yourSMTPserver" -Body $messageBody -Subject "$Env:TF_BUILD_BUILDNUMBER Build Notes" -BodyAsHtml

The build scripts should be checked in to TFS as shown below.

image

If there is multiple script then a run script can be used to call other scripts. For example pre build run script for above shown picture is below.


1
2
Invoke-Expression "$PSScriptRoot\GenerateBuildNotes.ps1"
Invoke-Expression "$PSScriptRoot\ApplyVersionToAssemblies.ps1"

TFS build definition can be set to call the pre build and post build scripts.

image

With this build note as shown below can be obtained.

image

TFS 2013 Build – Unable to copy file

The error
C:\Program Files (x86)\MSBuild\12.0\bin\Microsoft.Common.CurrentVersion.targets (3797): Could not copy file “<file>” to “<bin directory>”. Exceeded retry count of 10. Failed.
C:\Program Files (x86)\MSBuild\12.0\bin\Microsoft.Common.CurrentVersion.targets (3797): Unable to copy file "<file>" to "<file>". The process cannot access the file “<bin directory>” because it is being used by another process.

occurs due to parallel msbuild processes running in a build trying to replace a single assembly referred more than one project parallel.
1
This error can cause random failures in builds which is not good. The teams may loose trust of the build system. Even if the cause of error due to code team will not pay attention since CI build failing randomly.
One way to solve this is to detect and prevent duplicate files from being copy to build output. To detect duplicate files tool explained here can be used.
How to resolve?
1. The easy fix for this is setting the build to run in a single process. Build definitions using template prior to TFS 2013 build templates, this can be set easily by going to build definition Process set “MSBuild Multi-Proc” to false.
image
2. However this is not possible in TFS 2013 build templates. To bring “MSBuild Multi-Proc” back to the TFS 2013 build templates follow the instructions explained in article here.
3. The other option is passing the process count to the build using “MSBuild Arguments”. using /m:1 (/maxcpucount:1) will run the build as a single process.
image


Wednesday 1 July 2015

Setup TFS 2015 Windows Build Agent

With TFS 2015 ( RC is available as of now) new build system is introduced. Below is a guide to setup an agent for the new build system.
To download the build agent setup files go to admin mode of the TFS web portal and download the agent.
1

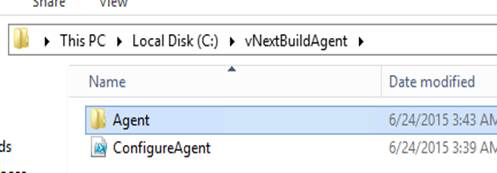
Extract the contents of the downloaded zip file, to a folder in the machine which is going to be setup as the build agent.
3
Open a powershell window  as administrator and change directory to the extracted folder. Run the ConfigureAgent.ps1. Provide below details for the agent.
* Agent Name
* TFS URL -  This should be TFS Server url, not project collection url.
* Specify an agent pool to join.
* Specify a working folder path. Which will be used to download source code and run the builds
* Set the build agent to run as a widows service. Windows service is the better option for production usage.
* Specify credentials for agent service.
5
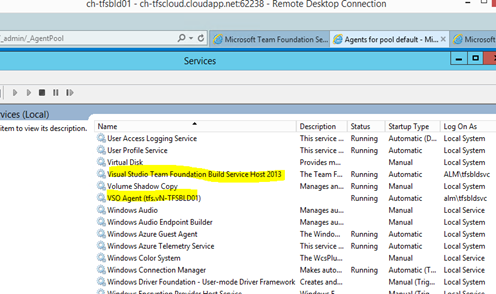
Once this is done the agent service can be seen up and running as a windows service.
7
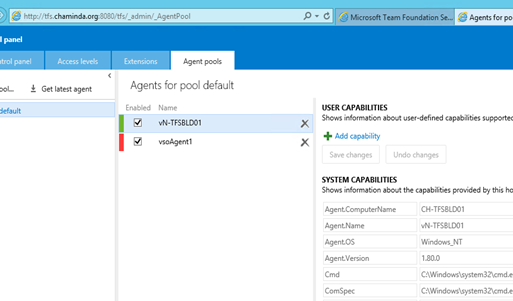
The new build agent is available for the build agent pool.
6
The new windows build agent and XAML build agent can coexist in the same machine, which would useful to support already available XAML build definitions.
8
9

Popular Posts