Build a simple calculator
First we have to develop a simple calculator to use for our first Coded UI Test. Create a ASP.NET Empty Web Application and add a web form Calculator.aspx. Then Add following html in between the form tag of the aspx.
 In the code behind write the methods to handle calculator operations.
 Build the web application project and host it in the IIS as a website. Now our calculator is ready for functional testing.
Recording the test actions
First create a Test project in visual studio 2010. Right click on the project and click Add New Item.
 Add Coded UI Test Map file to the test project naming it to TestCalculatorUIMap.uitest. This will minimize the visual studio and launch Coded UI Test Builder.
 In the test builder click start recording. Launch the IE 7 or 8 and load the calculator we have have hosted earlier. If you are running IE 9 then you have to set it to compatibility mode which I will explain later. Enter Input data and click on + button.
 Pause the recording and click on generate code button. Give EnterNumsAndClickAdd as the method name and generate the method. This will create code for the actions that you have done. Now drag the cross hair icon from coded UI test builder to the results text box it will be highlighted and you will see the assert window. Assert will evaluate the result of the add action.
 In the Assertion window select the Text Property of the text box and click Add Assertion. This will prompt for a method name.
 Select the comparator as AreEqual and enter value as 30 and click OK button. Then click on generate code and give the method name as AssertAdd.
 Once the code is generated close the Coded UI Test Builder. You can see a code files TestCalculatorUIMap.cs and TestCalculatorUIMap.Designer.cs are added. The designer.cs file contains the generated methods.
Next we will add a CodedUITest to our test project to execute the generated test methods. Right click on the project and click add CodedUITest naming it to TestCalculator. "Generate Code for Coded UI Test" window will popup but we will skip this option by clicking cancel since we have already generated our methods for enter numbers and evaluate add operation. Why I am suggesting this way is it will give you a grater flexibility to author a code UI test rather than using the prompted window.
If you examine the added Coded UI test file TestCalculator.cs you will see following methods and few other attributes.
 We will manually add code for the CodedUITestMethod1 to do our test. First rename CodedUITestMethod1 to TestCalc and insert the below code.
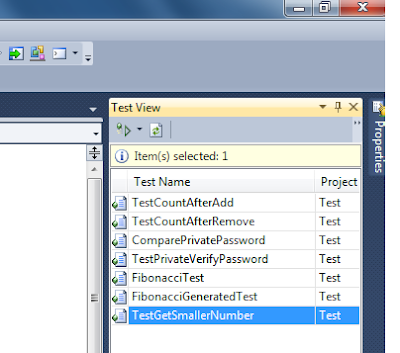
 Open the Test View window (Test --> Windows --> Test View) and click refresh to build the project. You will see the TestCalc method appears in the Test View window.
 If we run this coded UI test TestCalc it will open up IE , navigate to TestCalculator.aspx and do a test for add operation. Test will pass. But you will see a small problem... Ok.. it always run with the data you have recorded the test with. I will explain how we can make the coded UI Test to work with different set of data in my next post.
Now If you want to generate test and assert methods for other operations of our calculator, you can do so by right clicking on TestCalculatorUIMap.uitest and clicking on Edit with Code UI Test Builder. This will launch the Coded UI Test Builder where you can record more test actions and asserts to the same TestCalculatorUIMap.uitest file.
IE 9 compatibility mode
MSDN says "You cannot create an action recording using the standard mode for Internet Explorer 9 because the new features and controls for Internet Explorer 9 are not currently supported." . So you have to set the IE 9 to compatible mode to Author Coded UI Test with it. In IE 9 go to Tools --> Compatibility View Settings.

In the popup window add localhost (Where our calculator is hosted) to compatibility view.


