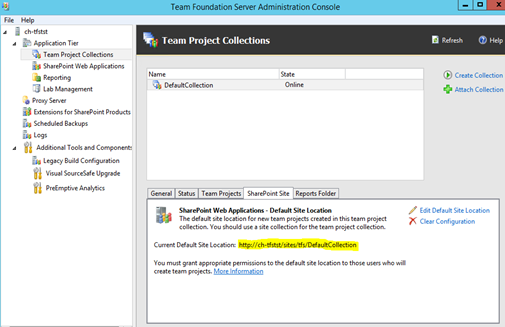
Basic guidelines available in below articles.
https://www.visualstudio.com/en-us/get-started/release/deploy-no-agents-vs
http://blogs.msdn.com/b/visualstudioalm/archive/2014/07/07/how-to-setup-environments-for-agent-less-deployments-in-release-management-release-management-2013-with-update-3-rc.aspx
Fist step is enabling PowerShell remoting in target server. Execute below command to enable PS remoting in PS administrative mode.
Enable-PSRemoting –Force
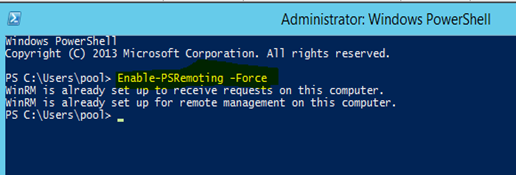
Configure WinRM port for HTTP communication execute below command.
winrm quickconfig -transport:http

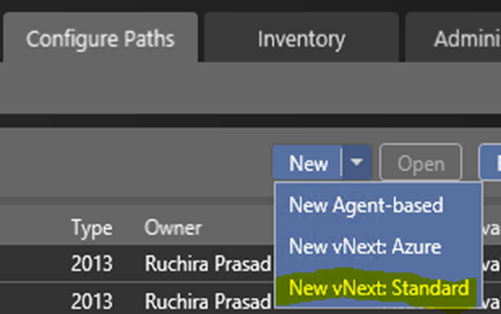
In VS Release Management Client go to Configure Paths – > Environments and click New vNext: Standard.
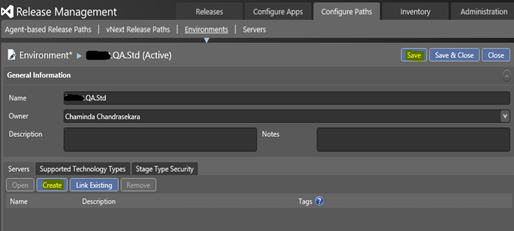
Provide a name and save the environment. Then click Create in Servers tab in the created Environment to add the target server.
To create the target server in Release Management communication port of the target server is required. To get it execute below command in the target server.
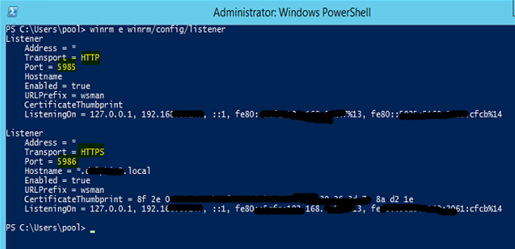
winrm e winrm/config/listener
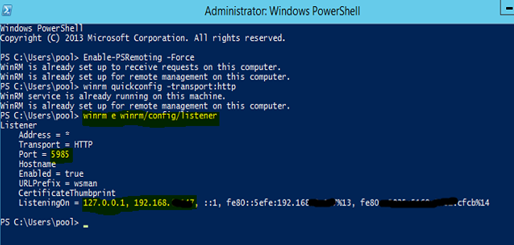
Target server is listening in port 5985 for HTTP communication. Provide the IP address and the port name as DNS name in the Release Management for the target server information. IP address is used here since FQDN is not valid and cannot be resolved since the target server domain is isolated domain.
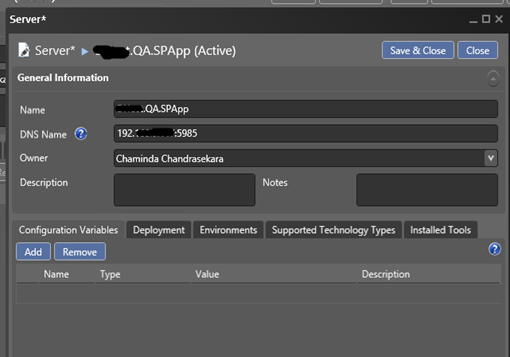
Save & Close the server information and it is added to the vNext environment. Save the environment. Define the tags as required for the server. (SPApp is defined here to refer to SharePoint App Server)

Next step is to setup a vNext Release Path.

Select the vNext Environment in the release path and save it.
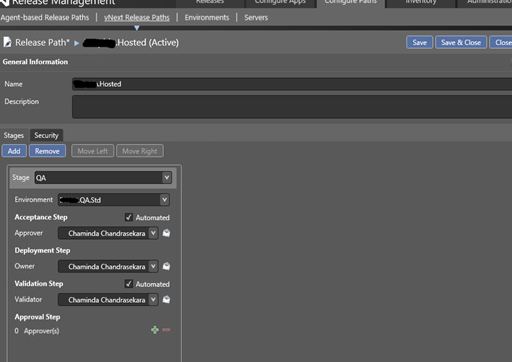
To create a vNext Release template go to Configure Apps – > vNext Release Templates and click New.

Select the created vNext Release Path and a TFS team Project Build and a Name for the vNext Release Template click Create.

To add a Component for deployment right click on the Components and click Add.
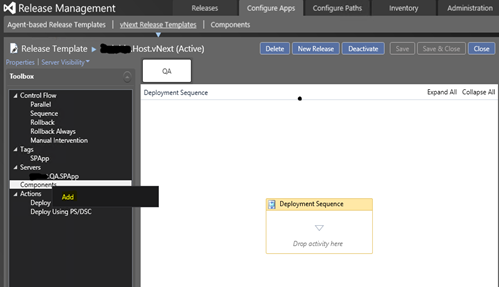
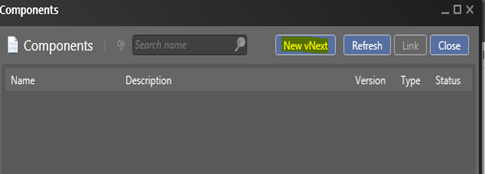
In the Components window click New vNext to create the component.
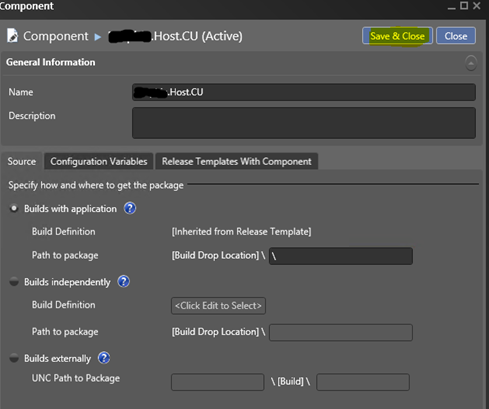
Set a build drop location and provide a name for the component and save & close.
Select the created component and click on Link to add it to the template.

Expand the actions and add “Deploy Using PS/DSC” action to the deployment sequence.

The target server and the deployment component should be provided in the added action. Provide target server domain credentials for the action to execute PS scripts in the target server.

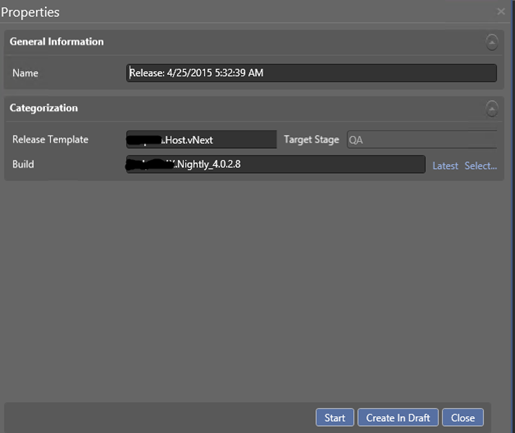
Trigger a release in the Release Management Client to test the template.
Release deployment action fails with below error message.
*******************************************************************************************************
System.Reflection.TargetInvocationException: Exception has been thrown by the target of an invocation. ---> System.AggregateException: One or more errors occurred. ---> Microsoft.TeamFoundation.Release.Common.Helpers.OperationFailedException: Failed to establish remote power shell session to the deployment machine 192.168.x.xxx on the port:5985 due to unexpected exception. Error Message:
System.Management.Automation.Remoting.PSRemotingTransportException: Connecting to remote server 192.168.x.xxx failed with the following error message : The WinRM client cannot process the request. Default authentication may be used with an IP address under the following conditions: the transport is HTTPS or the destination is in the TrustedHosts list, and explicit credentials are provided. Use winrm.cmd to configure TrustedHosts. Note that computers in the TrustedHosts list might not be authenticated. For more information on how to set TrustedHosts run the following command: winrm help config. For more information, see the about_Remote_Troubleshooting Help topic.
*******************************************************************************************************

Since the target server is in an isolated domain setting up HTTPS communication is required. For this it is required to create/buy a SSL certificate. If the target environment is a development or test environment setting up a self singed certificate is cost effective. Below links provide details on setting up a self signed certificate.
http://weblogs.asp.net/scottgu/tip-trick-enabling-ssl-on-iis7-using-self-signed-certificates
http://www.jayway.com/2014/09/03/creating-self-signed-certificates-with-makecert-exe-for-development/
http://www.mikeobrien.net/blog/creating-self-signed-wildcard/
http://blogs.technet.com/b/uday/archive/2012/06/21/makecert-exe-san-and-wildcard-certificate.aspx
http://blogs.technet.com/b/salbawany/archive/2014/05/24/how-to-create-a-self-signed-wild-card-ssl-certificate.aspx
It is better to use a wildcard certificate for this purpose since it will work for all machines in the target domain and can be reused. For example it can be set up for *.chaminda.net where the domain is chaminda.net.
Add the wildcard certificate to the target server Trusted Root Certificates as described in below articles.
https://technet.microsoft.com/en-us/library/cc754841.aspx
http://blogs.technet.com/b/sbs/archive/2007/04/10/installing-a-self-signed-certificate-as-a-trusted-root-ca-in-windows-vista.aspx
Enabling remote PS over HTTP for a server is described in below links.
https://wprogramming.wordpress.com/2011/07/11/remote-pssession-over-ssl/
https://technet.microsoft.com/en-us/library/dd347642.aspx
https://github.com/AppVeyor/AppRolla/wiki/Configuring-Windows-PowerShell-remoting
Obtain the certificate thumbprint as described in above links and use below command in target server to enable PS remoting over HTTPS communication.
winrm create winrm/config/listener?Address=*+Transport=HTTPS `@`{Hostname=`"`*.chaminda.net`"`; CertificateThumbprint=`"`8c a0 57 4c 9b 24 24 f0 52 65 0e ce 64 04 83 26 2a 68 5a 86`"`}
Host name (*.chaminda.net) and certificate thumbprint value should be replaced with the actual certificate CN and the thumbprint.

Check available listeners in the target server with “winrm e winrm/config/listener” shows HTTP and HTTPS communication can be used. HTTPS port is 5896.
Open 5896 port in firewall of the target server with below command
netsh advfirewall firewall add rule name="WinRM (HTTPS)" protocol=TCP dir=in localport=5986 action=allow

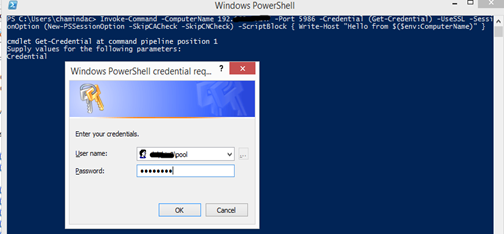
Test the accessibility from RM server to the target server with below command.
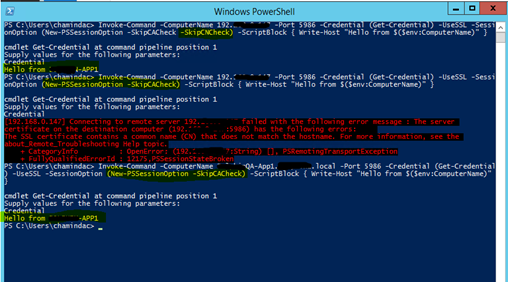
Invoke-Command -ComputerName 192.168.X.XXX -Port 5986 -Credential (Get-Credential) -UseSSL -SessionOption (New-PSSessionOption -SkipCACheck -SkipCNCheck) -ScriptBlock { Write-Host "Hello from $($env:ComputerName)" }
Communication with HTTPS is successful.

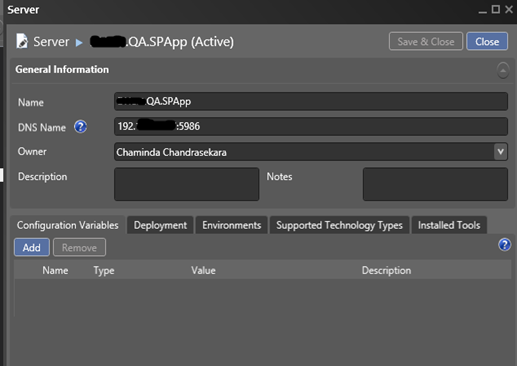
Update the target server in RM to use HTTPS port.
In the “Deploy Using PS/DSC” action set SkipCACheck (Will not check for Certification Authority. This should be set since using a self signed certificate) and use HTTPS.

Trigger a release and it fails with below error.
*******************************************************************************************************
System.Reflection.TargetInvocationException: Exception has been thrown by the target of an invocation. ---> System.AggregateException: One or more errors occurred. ---> Microsoft.TeamFoundation.Release.Common.Helpers.OperationFailedException: Failed to establish remote power shell session to the deployment machine 192.168.x.xxx on the port:5986 due to unexpected exception. Error Message:
System.Management.Automation.Remoting.PSRemotingTransportException: Connecting to remote server 192.168.x.xxx failed with the following error message : The server certificate on the destination computer (192.168.x.xxx:5986) has the following errors:
The SSL certificate contains a common name (CN) that does not match the hostname. For more information, see the about_Remote_Troubleshooting Help topic.
*******************************************************************************************************
This error raised because the certificate CN is referring to domain (wild card *.domainname.local).
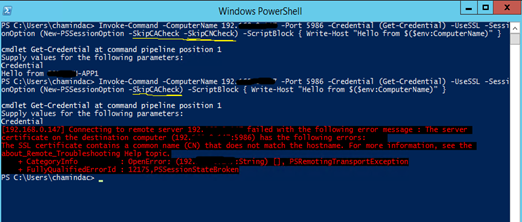
The test with PowerShell from RM server worked earlier because it contains instructions to skip the CN check (–SkipCNCheck).
If executed PowerShell without –SkipCNCheck it fails as below same error “CN does not match”.
To fix this in the RM server add a host file entry to IP as shown below.
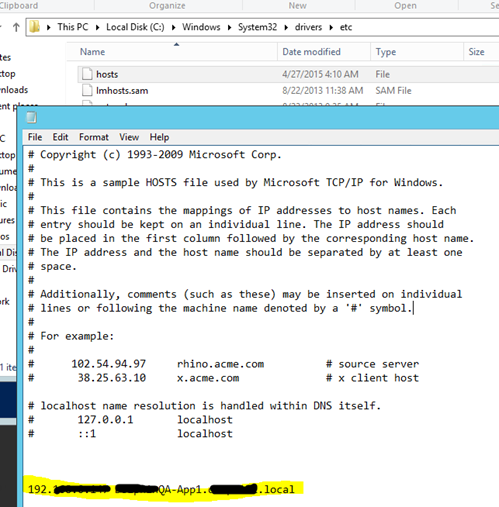
PowerShell now can connect to target server from RM server using the specified host name to locate the target server, without having to use the –SkipCNCheck.
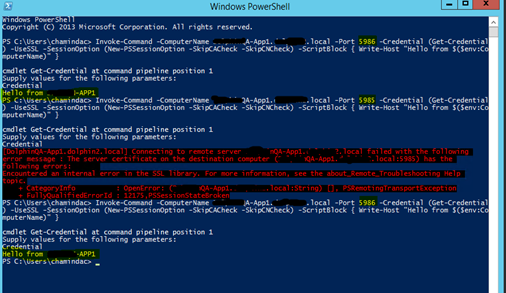
There could be a doubt if this is only an issue of the host entry to use FQDN to access the target server and no need of a HTTPS communication. To verify this access the target server from RM server using HTTP port 5985 and FQDN. This also fails and indicate PowerShell cannot remotely connected with HTTP and FQDN to outside domain target server even with a host entry in the RM server.
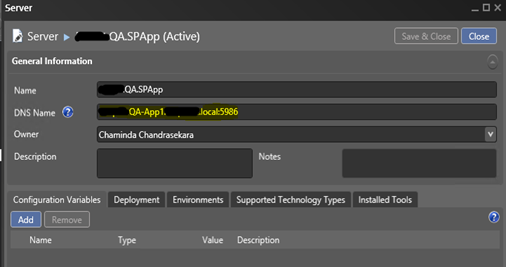
Update the target server in RM to use hostname specified in the RM server for the target server (target server FQDN)
Trigger a release and now communication seems to be fine to the target server but fails to read the build drop using the target server credentials. Release fails with below access error.
*******************************************************************************************************
System.Reflection.TargetInvocationException: Exception has been thrown by the target of an invocation. ---> System.AggregateException: One or more errors occurred. ---> Microsoft.TeamFoundation.Release.Common.Helpers.OperationFailedException: System.AggregateException: Failed to execute the powershell script. Consult the logs below for details of the error.
System.Management.Automation.RuntimeException: Copying failed. Consult the robocopy logs for more details. ---> System.Management.Automation.RuntimeException: Copying failed. Consult the robocopy logs for more details.
ROBOCOPY :: Robust File Copy for Windows
-------------------------------------------------------------------------------
Started : Monday, April 27, 2015 1:16:41 AM
2015/04/27 01:16:45 ERROR 1326 (0x0000052E) Getting File System Type of Source \\BuildDropServer\BUILDDROP\ProjectX\BuildX\Build_X.X.X.X\
The user name or password is incorrect.
Source - \\BuildDropServer\BUILDDROP\ProjectX\BuildX\Build_X.X.X.X\
Dest : C:\Windows\DtlDownloads\xxxxxxxxxCU\
Files : *.*
Options : *.* /S /E /DCOPY:DA /COPY:DAT /PURGE /MIR /NP /R:10 /W:60
------------------------------------------------------------------------------
2015/04/27 01:16:56 ERROR 1326 (0x0000052E) Accessing Source Directory \\BuildDropServer\BUILDDROP\ProjectX\BuildX\Build_X.X.X.X\
The user name or password is incorrect.
Waiting 60 seconds... Retrying...
2015/04/27 01:18:05 ERROR 1326 (0x0000052E) Accessing Source Directory \\BuildDropServer\BUILDDROP\ProjectX\BuildX\Build_X.X.X.X\
The user name or password is incorrect.
*******************************************************************************************************
The above issue can be resolved using a shared UNC path (described in this link http://blogs.msdn.com/b/visualstudioalm/archive/2014/11/11/what-s-new-in-release-management-for-vs-2013-update-4.aspx).
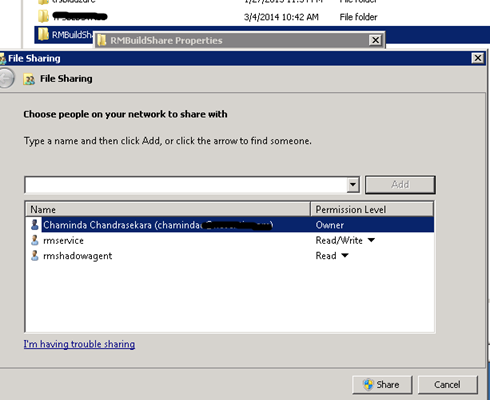
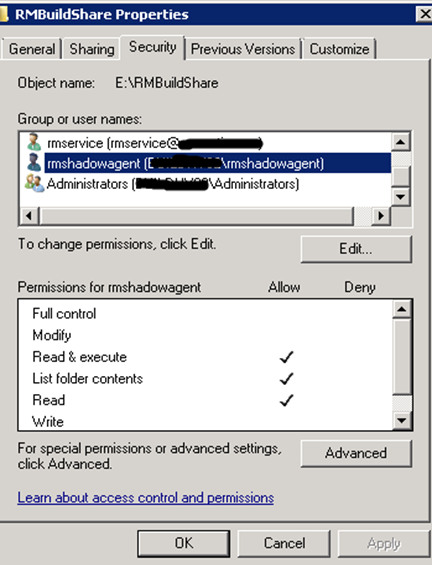
This shared path should be accessible by RM service account for read and write, and from the target server for read access. RM server will copy build output to shared UNC path and RM “Deploy Using PS/DSC”action will copy from UNC Shared path to the target server.
In the RM client Target Server information go to Deployment tab and change “Drop Location Access” to Use Shared UNC Path.
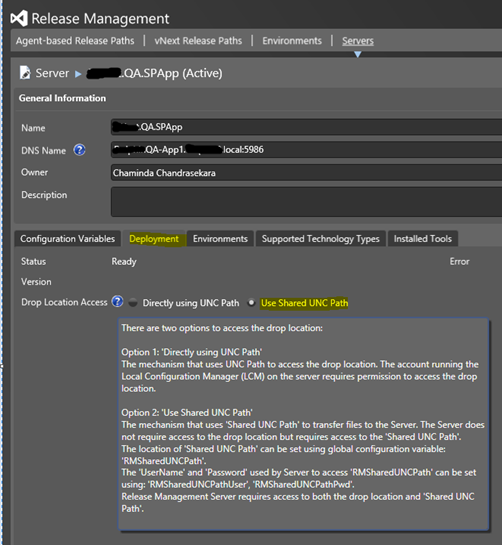
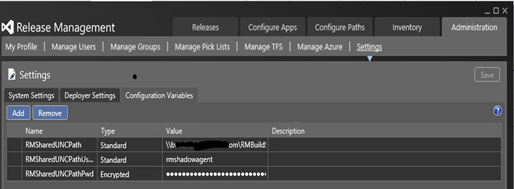
Set the shared UNC path location using RMSharedUNCPath as a global configuration variable.
Define credentials having permission on the shared UNC path using global configuration variables RMSharedUNCPathUser, RMSharedUNCPathPwd
Create a user locally on the target server and in shared drop location server with same user name password.
Share the folder with Read/Write access to RM service account and with Read access to the RMSharedUNCPathUser.

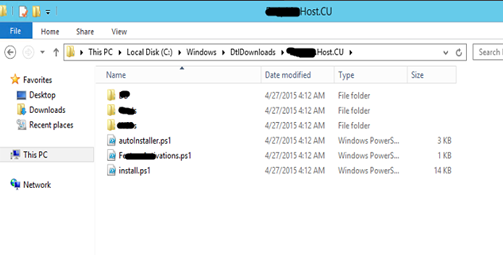
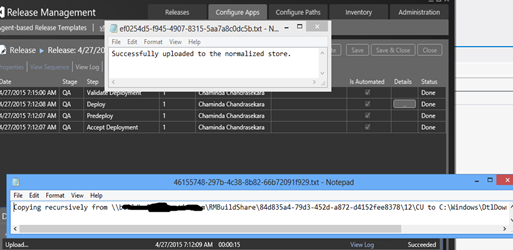
Deployment succeeds and build output copies to the target server.

I will describe executing PowerShell script in the target server with vNext release in a coming post.

