Saturday, 5 December 2015

Apply Build Number to Assembly Version with New TFS Builds (Build vNext)

To assign the build number as the assembly version, PowerShell script available here can be used. Let’s see how to set this up for TFS builds step by step.
First, a small console application created below as the sample.01
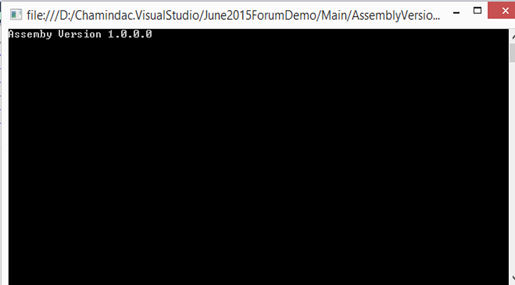
Code segment written to output the assembly version.02 03
Setup a build in Visual Studio Team Services to build the application. Build number is set to represent version 4.1.3.X (the X is the build number for version 4.1.3). This can be set to match regex pattern "\d+\.\d+\.\d+\.\d+". 04
05.2
Set the repository path05
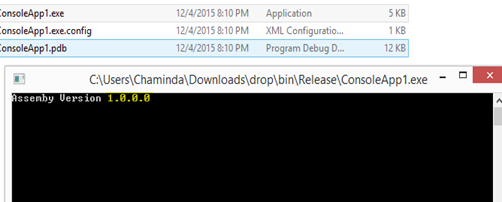
This builds successfully and the build output contains the .exe.06 07 08 09
Next download the “ApplyVersionToAssemblies.ps1” from here. Download link can be found in this page.10
Add the script to the Team Project and check in.11
Add new build step to execute PowerShell script.12
Move the added step as the first step.13
Set the script.14 15
16
When build script downloaded from github this error occurs due to incorrect environment variable. The script is developed to work with TFS 2013 XAML template builds. The scriptceript should be updated to “$Env:BUILD_SOURCESDIRECTORY”, “$Env:BUILD_BUILDNUMBER”, instead of “$Env:TF_BUILD_SOURCESDIRECTORY”, “$Env:TF_BUILD_BUILDNUMBER”. Remove the “-not $Env:TF_BUILD” condition.18
The above changes make the compatible to run with new TFS build. The assemblies now get updated with the build number as version number.19 20
21

Monday, 30 November 2015

VS Team Services – Work Item Visualization Extension

There are many great extensions available for Visual Studio Team Services (former VSO), in the Market Place. One of them is Work Item Visualization Extension. You can add this extension to your Visual Studio Team Services (VSTS) account.

First browse the extension in market place.01

Click on Install.02

Select the VSTS account.03

Confirm to install the extension.04 05

Extension installed for the VSTS account. 06

Work items can be visualize with the extension, with drill down capability.06.2

07

Tuesday, 20 October 2015

Send Test Result Email After Running Automated Tests with Release Management

Getting automated tests executed after deployment actions, it self is challenging with release management. Below are some helpful links on “how to overcome them”.
Resolve Common Errors - Run Automated Tests with VS Release Management 2013
Disable Lock Screen on Windows 8.1 to Prevent - Automation engine is unable to playback the test because it is not able to interact with the desktop
Increase Default Timeout of Copying Test Binaries to Test Client – Allow Release Management to Run Tests with Increased Timeout
Once everything in place, with a customized TcmExec.ps1, tests get executed with RM.image
[image%255B87%255D.png]
Wouldn’t it be nice to have an email delivered to the team with the test results like shown below?6
To do this it is possible to modify the TcmExec.ps1 (How to get the TcmExec.ps1 is described here), to read the details of the test result file (.trx) and create a formatted email message to sent to the defined recipients. As the first step script is introduced with few more parameters.image
Extract the build number from the build location path given that the build path contains it.This is to make Test result email look nicer if the build number is not supplied by build TM server.image
Extract test result details into a temp table to format it for the email.image
Send email and print result in output log of RM action.image
Avoid failing the Release Management Action, even if failing tests found when the email send option is set to true. This will make sure deployment completes and the required team members are informed of the Test Results. and give them the option of proceeding or stopping the release pipeline to next steps, after evaluating test results.image
Setup a custom tool in RM using the PowerShell script TcmExec.ps1. 1
If components are already created with the tool they need to be updated with new parameters manually.2
3
Set up the release template to use the test runner with new parameters. All other common issues mentioned at the linked post in the beginning of this post.4
5
Tests are getting executed in TFS lab environment with RM. 8
Release management action output log has the details of the test printed.7
Email with the test results sent to the defined recipients.6
You can download the enhanced TcmExec.ps1 from TechNet Gallery.
https://gallery.technet.microsoft.com/Send-Test-Result-Email-5b4f0d5e

Saturday, 10 October 2015

Increase Default Timeout of Copying Test Binaries to Test Client – Allow Release Management to Run Tests with Increased Timeout

Default timeout for downloading test binaries to execute automated tests in a lab environment is 5 minutes. This might not be enough if the test assemblies are high in size, and test client machine is in a different location from the build drop LAN having low bandwidth.
If running via RM server, MTM Test runner, test hangs on active and never get executed.image
trx file opened in Visual Studio Ultimate shows the exact issue.image
*******************************************************************************************************
Warning    9/25/2015 7:27:10 PM    Warning: Test Run deployment issue: The assembly or module 'Microsoft.Xrm.Sdk.Deployment' directly or indirectly referenced by the test container '\\builddrop\testautomation\xxx.automation.nonui.dll' was not found.   
Error    9/25/2015 7:32:15 PM    Agent vstfs:///LabManagement/TestMachine/36 exceeded deployment timeout period.    vstfs:///LabManagement/TestMachine/36
*******************************************************************************************************
How to resolve
The testcontroller deploys the test binaries and their dependencies from the build drop location to the test agent machines so that test agent can run them. The timeout for that activity is called deployment timeout.
Test setting should be created and set the deploy time out in the test settings, following instructions here. The command to execute is below.
UpdateTestSettings /collection:http://abc:8080/tfs/DefaultCollection /teamProject:myProject /settingsname:My2_0_App /bucketSize:200 /deploymentTimeout:600000
Next step is providing test settings to the test run via the RM server, MTM Test runner. For this TcmExec.ps1 explained here, has a parameter for test settings.0
To provide this in the RM tool (custom tool created using the TcmExec.ps1 explained here), add a parameter as shown below.image
This will not be applied to existing components created with the RM tool. Update them to have the SettingsName parameter.2 image
This allows the SettingsName to be supplied to the test via Release Management Template.4
Test now executes after successfully downloading the test binaries to the test client.image

Popular Posts