In this fourth step of Setup Virtual Environment for TFS 2013 - Using Virtualbox, I will explain how to setup SharePoint Foundation 2013 in the TFS server (I am going to setup SharePoint Foundation 2013 in the TFS box since I do not have hardware for many machines in my laptop).
But you have following choices to set up SharePoint for TFS (extract from TFS Installation Guide below) .
-
You can use Team Foundation Server standard or advanced configuration wizards
to install SharePoint Foundation 2013 on the same server as Team Foundation
Server. The Team Foundation Server extensions for SharePoint Products are
installed automatically during Team Foundation Server installation.
-
You can use Team Foundation Server extensions for SharePoint Products
configuration wizard to install SharePoint Foundation 2013 on a different server
from the one running Team Foundation Server.
-
You can use SharePoint Server. If you use the enterprise version of
SharePoint Server, you must configure it for dashboard compatibility (more on
dashboard requirements later).
- You can use a different version of SharePoint Foundation than the one that ships with TFS.
Even though it is possible to let TFS configuration wizard to install SharePoint Foundation 2013 automatically, I prefer to setup SharePoint Foundation and configure by my self.
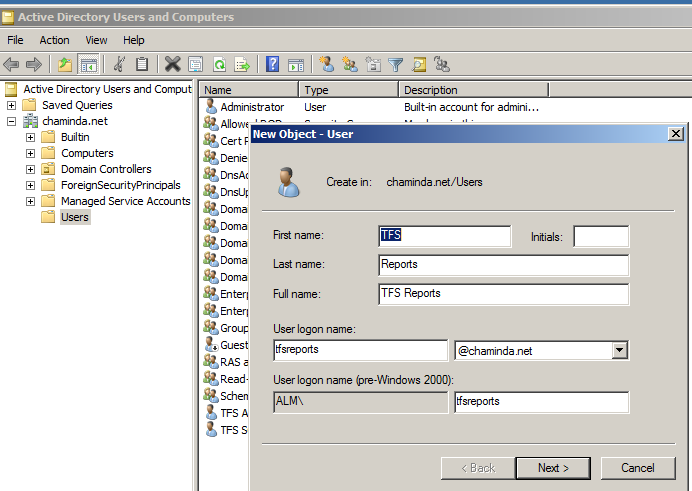
01. First create TFS report reader domain account in the PDC, which we will be using as SharePoint service account (report reader account will be SharePoint service account if installed with TFS configuration wizard).
02. To fulfill the TFS report reader account requirement, grant it Allow Log on Locally in the TFS server VM. (Refer Accounts Required for TFS)


03. Download SharePoint Foundation 2013. Log on to TFS server with TFS administrator account and launch the SharePoint installation and install the prerequisites. For installing prerequisites in offline mode refer to here.


04. Once the prerequisites installation completed successfully restart the VM and Install SharePoint Foundation.


05. Once Installation done run the configuration wizard.


06. Select Create a new farm.


07. Specify a free port here.


08. Once configuration wizard Finish clicked it will launch SharePoint Central Administration website. Access with TFS Administrator account.

09. Start SharePoint farm configuration wizard.

10. Use the report reader as service account and deselect all other options and click next.


11. In Create site collection step provide below details


With above steps we have completed setting up SharePoint Foundation 2013 for TFS. Our next step will be installing and configuring TFS Server.


3 comments:
To edit 'Allow Logon Locally' setting on the TFS Server in Step 2 (For Windows 2012, 2012R2 users).
You need to load 'Local Security Policy' tool. This will get you in the "Security settings" node. Now you can proceed with the 'Local Policies' --> 'User Rights Management'. Which contain the 'Allow Logon Locally' setting.
STEP 3: For Windows 2012 & 2012R2 Users
1st try to install the prerequisites via the setup wizard. if that fails, then use This Link to setup the prerequisites.
Ignore the update on the post saying it's obsolete as the Sharepoint Foundation 2013 doesn't have SP1 bundled (yet ;) )
This is quite helpful. But thankfully I didn't have to go through all this effort as I got a free SharePoint 2013 site with http://www.cloudappsportal.com.
Post a Comment